In this lesson
These optional exercises let you practise placing and releasing fretting-hand fingers. Choose one movement that serves something you want to play. You do not need perfectly independent fingers or a complete drill routine before learning music.
Set up a comfortable attempt
Use standard tuning, E A D G B E from the lowest-pitched string to the highest. String 1 is high E; string 2 is B. Finger numbers in this lesson mean 1 index, 2 middle, 3 ring and 4 little finger. Fret numbers are given separately.
Begin with some easy, familiar playing. For the exercises below, place each finger just behind its fret wire and use only enough pressure to sound the note clearly. Let the previous finger release as you change notes; there is no requirement to keep the unused fingers pressed down or fixed in the air. Move the hand when needed instead of forcing a stretch.
Take breaks and stop if playing hurts. Skip any exercise that causes discomfort or an awkward reach. If pain or other symptoms persist or keep returning, seek qualified healthcare advice. These are playing exercises, not a stretching programme or treatment for an injury.
Exercise 1: two neighbouring notes
Start without a beat so you have time to place each finger.
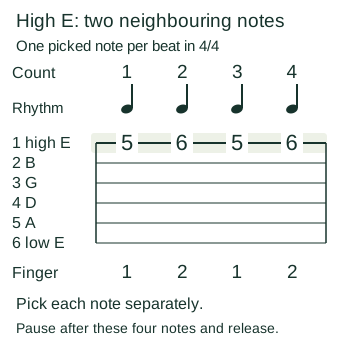
- On high E (string 1), fret 5 with the index finger. Pick the note once.
- Release the index finger and fret 6 on the same string with the middle finger. Pick that note once.
- Return to fret 5 with the index finger and pick it, then fret 6 with the middle finger and pick again.
- Pause, release your hand and check for unnecessary squeezing before trying another sequence.
You are playing frets 5 6 5 6, using fingers 1 2 1 2. Keep to this pair if it gives you a useful task. You do not have to widen the spacing or try every finger combination.
When the movement is manageable, use four quarter-note beats per bar (4/4) and place one note on each count: 1 2 3 4. Pause after the four notes. If you use the online metronome, select four beats per bar and let one click mark each number. Try 60 BPM as an example and adjust or turn off the clicks if they rush you.
Exercise 2: four fingers on one string
Try this only if each position is comfortable. All four notes are on high E (string 1):
| Count | Fret | Finger |
|---|---|---|
| 1 | 5 | Index (1) |
| 2 | 6 | Middle (2) |
| 3 | 7 | Ring (3) |
| 4 | 8 | Little finger (4) |
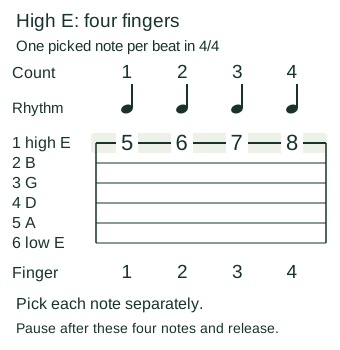
Pick each note once, releasing the previous finger as needed. Lift without deliberately plucking the string with the fretting finger: this is a picked exercise, not a pull-off drill. You can work without a count first and use one note per beat later.
Pause after the four notes and release. Listen for the intended note each time rather than holding all four frets at once. If reaching fret 8 is uncomfortable, return to the two-note exercise or choose a different task with a teacher’s help.
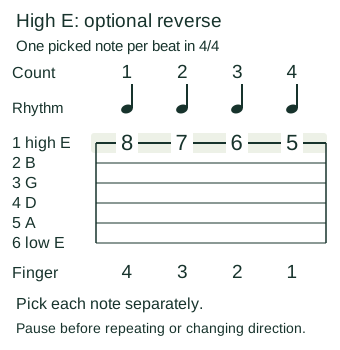
For an optional reverse sequence, play frets 8 7 6 5 with fingers 4 3 2 1, picking each note separately. If you count it, those notes fall on 1 2 3 4 in that order. Pause before repeating or changing direction.
Exercise 3: move a small pattern between strings
Use the two-note pair from exercise 1, first on B (string 2), then on high E (string 1). The first bar stays on B and the second stays on high E:
| Bar | String | Frets on counts 1, 2, 3, 4 | Fingers on those counts |
|---|---|---|---|
| 1 | B (2) | 5 6 5 6 |
1 2 1 2 |
| 2 | High E (1) | 5 6 5 6 |
1 2 1 2 |
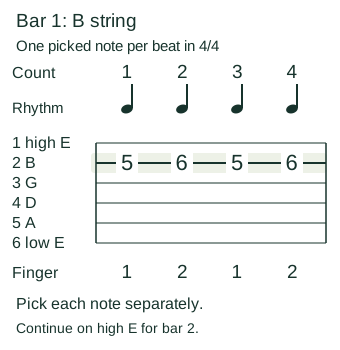
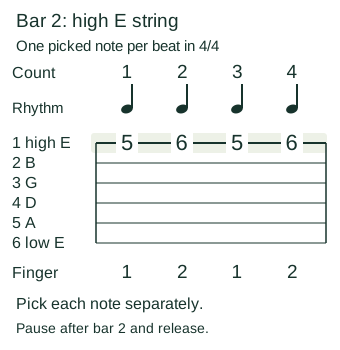
Pick one note per count and stop the previous note as you move to the next. Pause after the two bars and release. Before trying it in time, move between the strings without clicks and check that both hands find the intended string. There is no need to continue across all six strings in one attempt.
Decide whether the exercise is useful
Notice a specific result: did the intended note sound, did the pick find the correct string, and could you release without squeezing? Stop to adjust a recurring problem. No number of minutes or repetitions guarantees a change in your playing.
If your aim is a chord change, practise that change too. The first-chord lesson supplies complete shapes, and changing between chords gives a worked Am/C example. You can put a short exercise in the beginner practice routine and spend the rest of the session on music. The beginner troubleshooting guide covers pressure, rushing and unclear practice goals.
Source notes
Andy Guitar’s written fifth-position exercise and two-finger combinations provide examples of adjacent-fret and paired-finger work. The strings, counts and pause points above are specified for these practice versions. BAPAM’s warm-up guidance advises breaks and stopping for pain; its return-to-playing guidance explains why symptoms and playing load need individual attention.